Downloads

Disclaimer: These (and any other downloads on the website) are free and come with no guarantees that they will perform the way you may or may not expect them to. They are not official blender features and came out of GOD's leading for me to build them for use in my own projects - I was simply led to share them. Development and refinement was done on Blender 2.77a. Those I tested on 2.8 still performed as expected, so they should still be fine there too.

You download and use these solely and totally at your own risk. I just know they'll be a huge blessing to you!

Index:
 
2Depth
 - 2D to 3D (Warp)
 - 2D to 3D (Parallax)
 - Converter Anaglyph Color
 - Converter Anaglyph Grayscale
 - Converter Interlace
 - Converter L/R Stereo
 - Converter Side-By-Side (50%)
 - Converter Top and Bottom (50%)
 - Parallax Adjustment (SBS Input)
 - Pseudo Depth Map Generator
 - Progressive Defocus (10 Layer)
*3D Nodes: Support full color Red/Cyan Anaglyph.
For Anime
 - Defocus (2 Layer)
 - Liquefy
 - Motion Lines
 - Motion Smear (Fancy)
 - Motion Smear (Simple)
 - Sun Glare
 - Underwater Atmosphere
Gimpness
 - Brightness
 - Contrast
 - Hue
 - Hue, Sat, Contr. & Brightn.
 - Saturation 
 - Video Coloring
Quick Package
 - Analogue Signal Noise
 - Anti-Aliasing
 - Sun Glare
 - Blur
 - Film Effect
 - Old Black and White Film
 - Vignette
 - De-Interlace
 - Pixelation (Integrated)
 - Pixelation (Traditional)
 - Halftone
 - Halftone (Color)
 - Progressive Defocus (10 Layer)
Caution:
These have been designed to work at FullHD (1080p). Anything below or above that becomes unpredictable though not unusable, like the Quick Blur for example.
Download:  Direct, Google Drive
   2Depth   
2D to 3D (Warp)
A work of what feels like decades! You will luv the speed of this conversion node.

This one takes 7-12 seconds per frame if it's the only node in the project on my PC. Your speed will vary based on your system.

SuperFast Warping version:
The super fast version isn't a new approach, but it does skip all the extras and gives you the fastest possible conversion (at a minor sacrifice in clarity as opposed to the parallax method).
   It also gives a reduced number of output formats to help speed things up.
2D to 3D (Parallax)
Probably the sharpest form of 3D conversion I have been blessed to get with Blender.

I totally recommend using two of these (LEFT output for both with opposite settings for depth and location) and use the L/R Stereo node to combine into whatever method you wish. The quality boost is incredible!

Caution: Watch out for transitions between layers.
Converter Anaglyph 3D Nodes
Convert Anaglyph back to 2D or other 3D methods using these nodes (obviously in varying capacity, since Anaglyph is such a baked in format).

The meaning of the Row 1-3 is simply that you are now able to warp the red channel to better fit the Cyan. It's only split into 9 sections of warping, so it's not always going to fit perfectly, but will fit better than shifting the whole thing left or right. Shifting it also enables you to do some brightness repair for the red channel when converting full Color Red/Cyan anaglyph to a grayscale one (for whatever reason). 
Only the right is being output for 2D Color since the red is only 1/3 of that image. To warp the Cyan is really obvious and the resulting 3D isn't super appealing. Consequently, the outputs are mostly grayscale.

Don't be shy with the warping values. Proper depth anaglyph will probably shift up to a value of 50 either way (left is negative value, right is positive value). 

NOTE: The previous one has been removed because it failed in a few sections. Plus it was rather huge, hahaha. Two smaller nodes will serve you much better.

The Color node works best with optimized anaglyph (as performed by the 2D to 3D nodes), because the whole red channel is the grayscale equivalent of a whole eye, not just the red channel.
True example of full color anaglyph repair.
The glare is unfortunately obvious, but it still looks really nice!
Interlace is a 3D method that doesn't seem to have ever really gained much traction. Be that as it may, it is still used and if you need it taken to a different method or to 2D, this is the node for you!

Personally, I never use it, so clearly this is for someone else.
Converter Interlace 3D
This one is extremely useful for those of you who do manual 3D photography. This treasure of a node will do all the hard stuff for you and you just pick the method, connect it and hit F12.

I use it in conjunction with other 3D nodes to process higher quality 3D. Sometimes glows, transparency or lights need to be processed apart from other objects in the scene and this one helps make that possible.
Converter L/R Stereo 3D
Hello to one of the hardest working nodes in the group! I use this one just as much, if not more, than the 2D-3D nodes, because the result needs to be previewed and YouTube also uses SBS (50%) so guess which format I save in?! Yeah!

I can only view Anaglyph on my system, so that is the dominant result these nodes were based on.
Converter Side-by-Side (50%)
Converter Top and Bottom (50%)
Just like interlace, I rarely use this one, but it was sure handy when I had to test VR! If you are interested in doing VR, this is a very very helpful node.

Outputs to the most common 3D methods for testing and conversion.
A kinda take it as it comes node. It produces a depth map based on assumptions on color (ie no black and white images will work with it). The results are by no stretch perfect, but I have gotten some good results fairly quickly, so have fun with it!

I'm including it as a bonus.
Depth Map Generator (Psuedo approx.)
Parallax Adjustment (SBS)
Parallax Adjustment has to do with the distance between your eyes. Adjusting this, adjusts the relative position of the 3D to you. You can just bring all 3D forward or make all 3D recede - that's all it does.

It does require an SBS input and allows you to switch left and right if you need to for whatever reason.
   For Anime   
Defocus (2 Layer)
What a gift!!! GOD is soooo amazing!!
   This one also sports the ability to darken your fore- or background and the choice to pick between Bokeh blur or Gaussian.
To get the Bokeh image, see the Input category of nodes - you'll find it there.

You can see a tutorial on how this one works on YouTube:
Motion Lines
One of my personal favorites. It has gotten many new features including the ability to customly choose a color for your lines (including textures) or the image colors or a mix of both!

The LOD feature with the mist pass also works much better.
In addition to the motion lines, the LORD also helped me make a functional way to mask the vector pass. For some reason - might be a version bug - it would reduce the pass' range when masked through the mix node directly, but not with this little treasure! It's a very effective way to focus the effect!
Underwater Atmosphere
A very typical underwater approach, but one that I have seen used. Please don't feel obligated to use this in shallow water. It's honestly meant for open water. If you want to use it for the separation, you can go into the node and change some factor values to remove the coloring aspect with distance.
Motion Smear Simple
Motion smear is nothing new to animation and this one is, imo, very traditional in drawing the blur through partial shapes.
Motion Smear Fancy
Literally taking the simple smear and adding stuff to it, like distortion and real motion blur, but masked to give lines like brush strokes (animated on 2's).
Liquefy
I don't really know what the point of this one is, but it's a cool effect anyway! GOD is so cool!

This one features two animated textures. The distorted noise for foam lines and a cloud texture for the opaque section of the water. Shockingly, with all the adjustments, it's actually quite quick

I hope you find great use for this one.
Sun Glare
Can be a bit difficult to get used to, but once you know how it works, it truly lives up to it's name!
I updated it to be more consistent so that even if your sun is just a white disc, it will still give you a nice glare and you can also now adjust the roughness of the rainbow flare!
   Gimpness   
Brightness
Contrast
Hue
Hue, Sat, Contr. & Brightn.
Saturation
The goal of these nodes are to replicate, to an extent, the way that Gimp handles these things. They are not perfect, but they aim to be closer to Gimp than Blender's built-in functions.

Massive props to Bintang Senja. Check out his video on the way Blender handles these issues.
Video Coloring
This one is based on the Color Balance feature in Gimp. It tints three parts of brightness and it makes coloring black and white videos so much better than just sticking a color to it with the mix node.
It's the same method I use for coloring photos in general, so I know you'll luv it too!
General Billy Mitchell serving beef at farewell
   Quick Package   
Analogue Signal Noise
While I don't know what GOD's will is in giving me this one, I do believe it is supposed to go to someone. In the example, you can see that I've included that typical distortion you get with an increased intensity. It means you can have that breakup as it transitions to the typical white noise.
Sun Glare
One of my oldest group nodes, this one came from one of my first video tutorials as well! It also works by strength and can be a bit sensitive. Just play around with it, again following the instructions. It's been updated to be more user-friendly.
Blur
A very common one in my projects and one you'll see as a regular (along with the Vignette group), this node allows you to get that dreamy blur glow. You can use it in many clever ways!
Just see the Glow tutorial:
Old Black and White Film
With an active interest in coloring things, this is quite an addition. 
I also really like the look of old film - especially really old film, like this one. It is not a relative effect. It'll create noise for the size of frame it has, just like broader film will have more grain, so a higher resolution image will have more grain. 50% HD is a stunning fit for the old format. Also, since old cameras were often cranked, the playback speed is generally too fast and at a fairly low frame rate.

So, what you can do, is prep your color footage first:
50% HD resolution
Playback at roughly 1.5x
Framerate between 15fps and 24 fps

Remember that when you add this node, your output framerate and resolution needs to match the input footage for it to work.

This one adds:
- Flicker (Dynamic)
- Grain (Dynamic)
- Film spots (Dynamic)
- Softness (Dynamic)
- Darkness bleed (like a smear that is often from darker shapes)
De-Interlace
What a joy and gift this one was!! It gives pretty much identical results to Blender's default De-Interlacing in the VSE (though I strive to get near perfect results). Bonus feature is to be able to have only one or the other or an enhanced mix.
Vignette
A very common effect and often over-used - it is supposed to focus your attention on the center of the frame and allows you to convey certain atmospheric effects that suggest location (such as dreams or memories). Use sparingly.
Pixelation
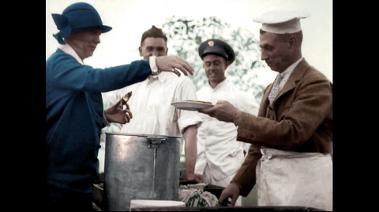
Pixelation is a very stylistic choice. Of course, when pixelating only a part of a video, we usually think of protecting people's identity or things like that. There are more character like uses for this. For example, if you think of doing an 8bit short film or something. You can still use 3D and have really pixelated characters in high detail environments.
Traditional is a very simple approach to pixelation:
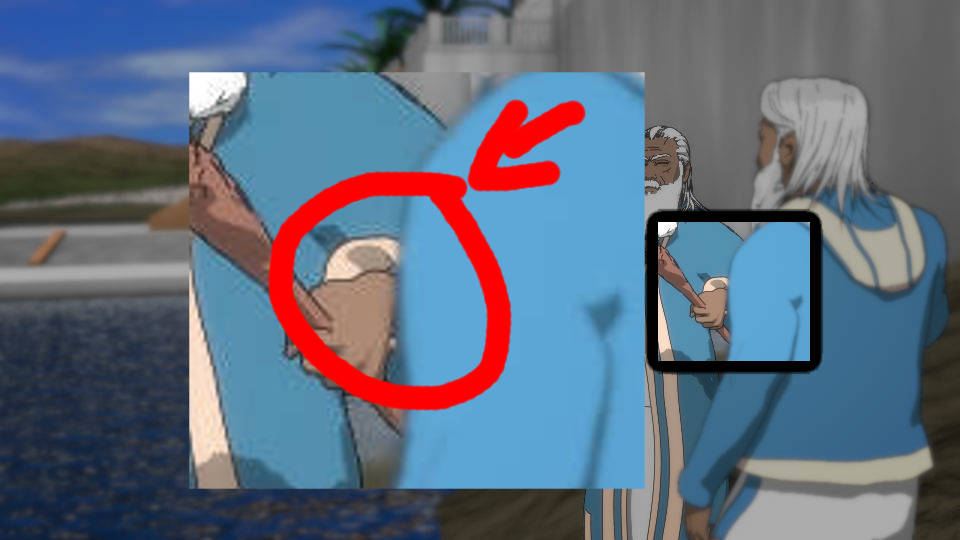
Pixelate everything and blur mask the area to be pixelated.
Traditional
Integrated allows for the mentioned scenario - cleaning up fore- and background to pixelate only what is masked (do bear in mind that it does use only pure black and white, since it has to do inPainting to produce a clean result). This simply means you might need to do a little extra compositing based on depth for a more gradual mix.
Integrated
Anti-Aliasing
Separate Anti Aliasing nodes for text and images. Surprisingly, to get effective text, you have to do things differently than images. I'm sure with more advanced testing for aliasing than I was enabled to do here, it can be better and work for both text and images.
OSAA (which is what I believe Blender Render uses), causes the render times to be slower than they needed to be. A post method, made the render go more than twice as fast (depending on overall render time of course).

   This is not a mere blurring node. This node tests for aliasing based on pixel width contrast. The text version also sports a threshold slider to adjust the sensitivity of the detection and additional extension blurring of the anti-aliasing based on the axis. On the image side, you also get to use the depth map for additional detection.

Caution: This does work based on contrast, meaning high contrast shapes with very sharp anti-aliasing will fall under the detection and very low contrast areas can be obvious yet still missed. It is resource intensive so if you want to do heavy post processing, I do suggest you consider making this it's own step.

Film Effect
One I don't use often, but luv that it is available, is this film effect. There is a very subtle charm to the old movie film. It's not perfect and that's the appeal. This node strives to get that imperfection into a world of CG that strives for perfection, but without overdoing it.
Halftone
Halftone, which originated somewhere around 1850, according to Wikipedia, is a very common occurrence in comics for it's visual style. Halftone is still used by some printers like the Inkjet printers, that use dots in close proximity to suggest colors. Old comics were also printed this way using the CMYK color profile.

Various resolutions are possible with this little node:
Click to see full-res
Result
Halftone gradient
Based on the grayscale halftone - actually containing it - this one simply breaks it into channels (including alpha) and also gives you an offset option. Edge gaps filled with InPainting.
Halftone (Color)

Progressive Defocus (10 Layer)

The 10 layer defocus is exactly what it says. The defocus progressively happens over 10 layers based on the depth map of the given scene. It does bring solutions to the table that Blender's does not seem to be able to produce (or that I suck at getting).

Front Defocus

The most important feature of this method is for objects in front of the camera to be out of focus and blur over objects in the background. I could NEVER get this result with the built-in Defocus node.

Center Focus Point

Center Focus Point (Full)

Download
Credit:
Big thanx to Andrew Price's tutorials. I learned the Quick Vignette from him and I believe the Quick Blur as well.

ALL IMAGES (C) MARIUS OBERHOLSTER
FOR MORE ABOUT EXODUS 7-12 KJV, VISIT:
Biggest thanx to GOD for helping me with this.
Without HIM, none of this, as everything else I get to do, would be possible! :D


Know JESUS yet?
To find out more about HIM, you can check out this link.
It gives you access to free Bible translations, free teaching videos and more.

Have a great one!
Thank YOU!
_______________

(+27) 073 104 2834   |   marius.oberholster@gmail.com   |   Contact